I enjoy building stuff that includes electronics, and I always wanted to build something using Arduino.
One of the most common builds for beginners I found was a MIDI controller. A MIDI controller is any hardware that sends MIDI data (Musical Instrument Digital Interface) to a device to trigger sounds and make music.
I found that many implementations are complicated, even those that are for beginners. It was very frustrating to find I need to use hundreds of lines of unreadable code. Or that I need to solder a resistor in some cases, among other examples.
The Project
By building my own Arduino MIDI Controller, I intended to do an enjoyable project, keeping the noise at the lowest. Something any beginner could follow. To accomplish that, I used the MIDI Fighter Spectra as a base inspiration and removed every non-essential feature.
The total cost of my project was under $30, and the list of materials was concise (affiliate links):
- Arduino Leonardo (or clone): between $10 and $20.
- 16 x Sanwa buttons 24mm (or clone): between $1 and $2.50 per button.
- Soldering Iron
- 22 AWG Electrical Wire
Take a look at how was the experience building this controller:
The Arduino Board
When I started this project I found many new Arduino models (not including the hundreds of compatible boards). And all of them offer slightly different capabilities.
I needed to send MIDI signals to a computer, and the simplest way to do that is through USB. Any Arduino board based on the ATmega32u4 microcontroller has built-in USB communication.
The official Arduino boards with native USB support are Arduino Due, Arduino Zero, Arduino Leonardo, Arduino Micro. These boards have integrated USB support, which means they can act as a USB MIDI device.
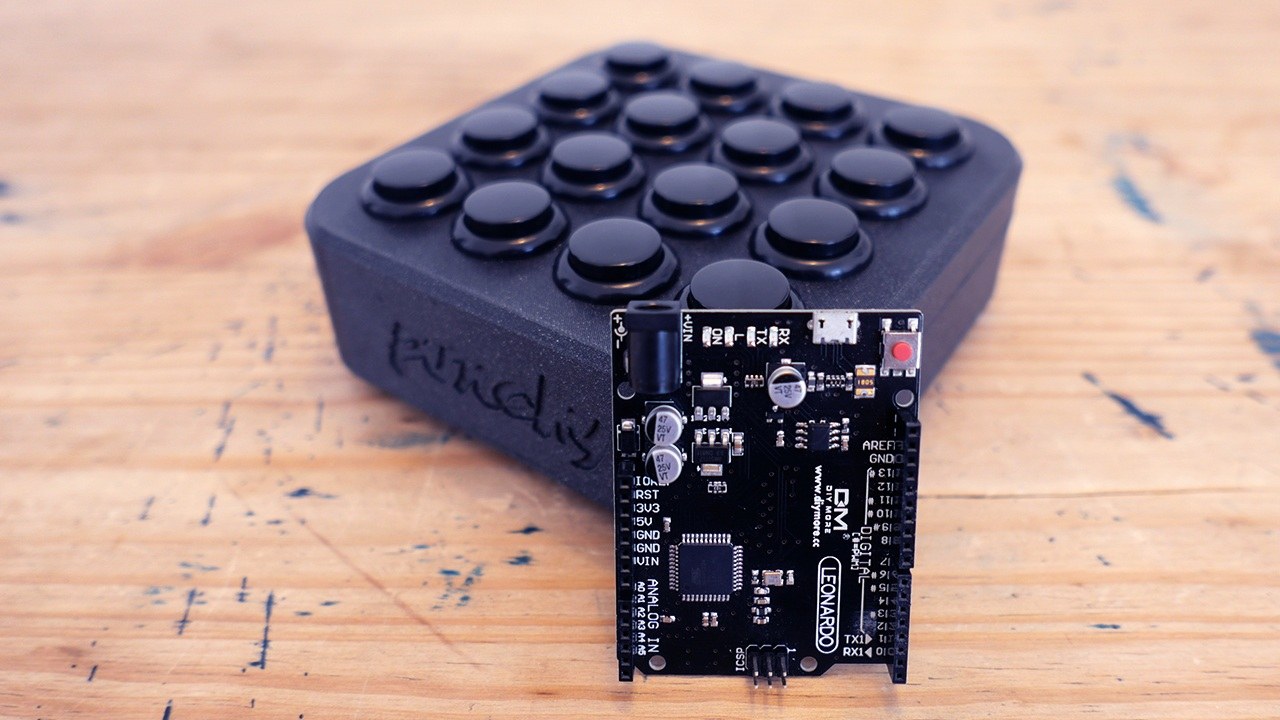
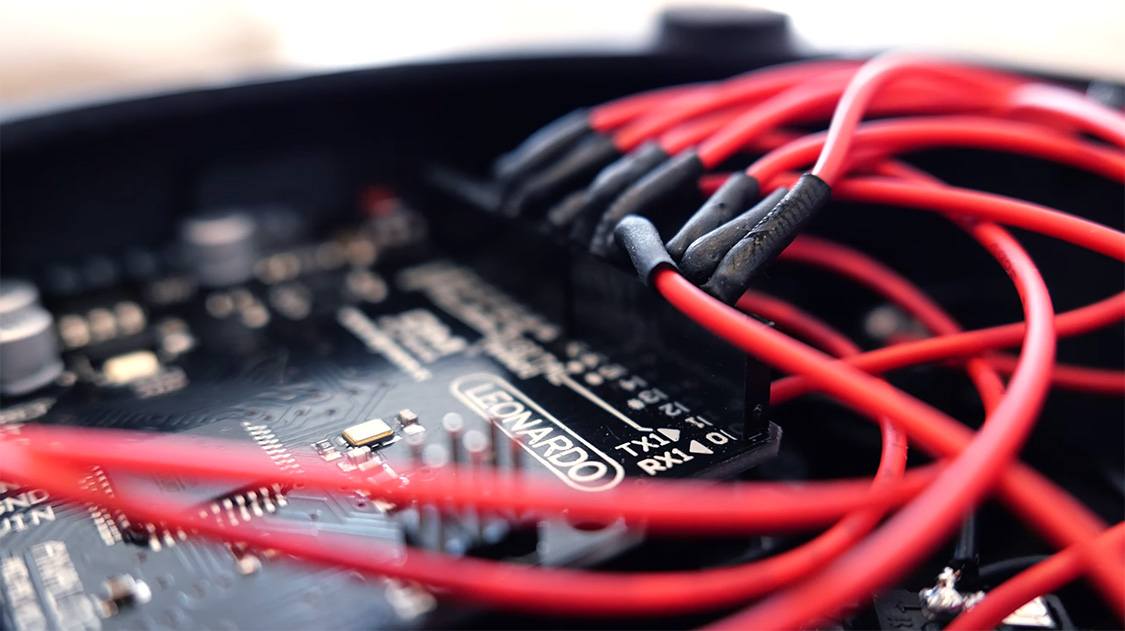
I decided to go with a clone of the Arduino Leonardo. It has enough inputs for this project, and it also includes headers, which makes it easier to plug/unplug wires.
First Steps
Although I'll explain step-by-step how I implemented the code for this project, you can download the final version.
To upload code to the board, you need to use the Arduino IDE. They also have a handy Web editor, but they have a limited quota on times per day to compile code.
Step 1. Blinking the built-in LED
It's funny how the "Hello World" in the world of hardware is blinking an LED.
It was a pleasant surprise for me to discover that Arduino Leonardo has a built-in LED that you can blink to test your code. That way, you don't need to build an external circuit on a breadboard with an LED and a resistor.
Step 2. Blinking the LED on a manual input
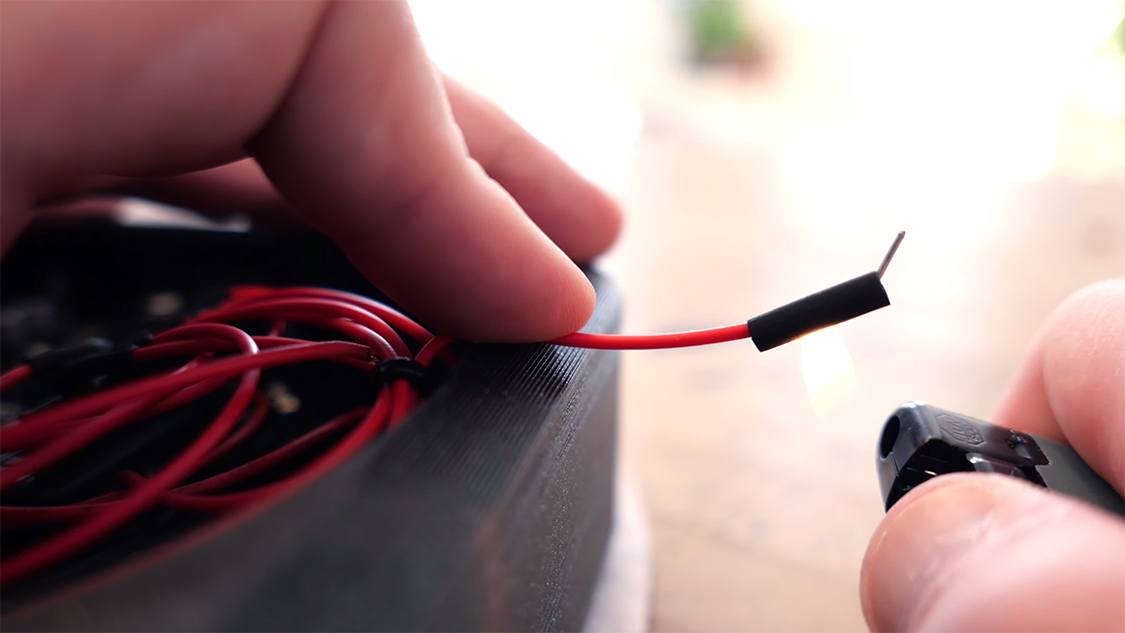
The next logical step was to blink the same LED whenever I send some signal. I removed the plastic cover of one end of 2 Dupont wires, and connected the other end to the board:
- PIN
2: One of the digital inputs (positive). It could be any digital pin. - PIN
GND: Any ground pin (negative).
Every time I join the wires' exposed ends, I'm closing the circuit, and thus I can execute code in consequence.
Each of the 20 digital pins on the Leonardo has an internal resistor (disconnected by default) that can be enabled using INPUT_PULLUP. Keep in mind that a pull-up input means the button state is inverted:
HIGHwhen the circuit is open (button is NOT pressed).LOWwhen the circuit is closed (button is pressed).
Step 3: Installing the MIDIUSB library
This library allows an Arduino board with USB capabilities to act as a MIDI instrument over USB. Check the official documentation for more info.
Using the Arduino IDE, you can install extra Arduino Libraries using the Library Manager:
- Open the IDE and click on the "Sketch" menu, then "Include Library", then "Manage Libraries".
- Search for MIDIUSB and click Install.
- Once it has finished, an Installed tag should appear next to the MIDIUSB library.
- Close the Library Manager.
Now the Leonardo can send MIDI messages via USB! But first, some insight into how MIDI works is needed.
How MIDI Works
"MIDI (Musical Instrument Digital Interface) is a standard communication protocol that connects electronic musical instruments, computers, and related audio devices for playing music." — Wikipedia.
It handles event messages with data of the pitch and velocity of the note played, among other instructions.
In this specific project, the input from the 16 buttons sends different messages via USB. These messages can be converted into sound on a computer using any suitable software like GarageBand or Ableton Live.
Anatomy of a MIDI message
To send a MIDI message, I used the sendMIDI() method from the MIDIUSB Library I installed on step 3.
This method can receive four parameters:
- Event type: It can be
0x09for note On (play note) or0x08for note Off (stop playing note). - Note On/Off: The event type combined with the MIDI channel (1-16). I only use channel 1, so it's either
0x90for note On or0x80for note Off. - Note number: Each note has an associated numeric pitch (frequency scale).
- Velocity: From
0(no velocity) to127(fastest).
Step 4: Sending a MIDI message
I included the MIDIUSB Library, and instead of blinking the built-in LED, I sent a note.
⚠ Important:
The Arduino turns into a MIDI USB Controller from this step onwards, and it stops receiving code via USB.
When you get stuck in a position where you can no longer program the Arduino, follow these steps:
- Hold down the rounded reset button on the Arduino board.
- Click Upload on the Arduino IDE.
- Release the reset button.
- The IDE will upload the updated code to the board.
Step 5: Sending a MIDI message from each button
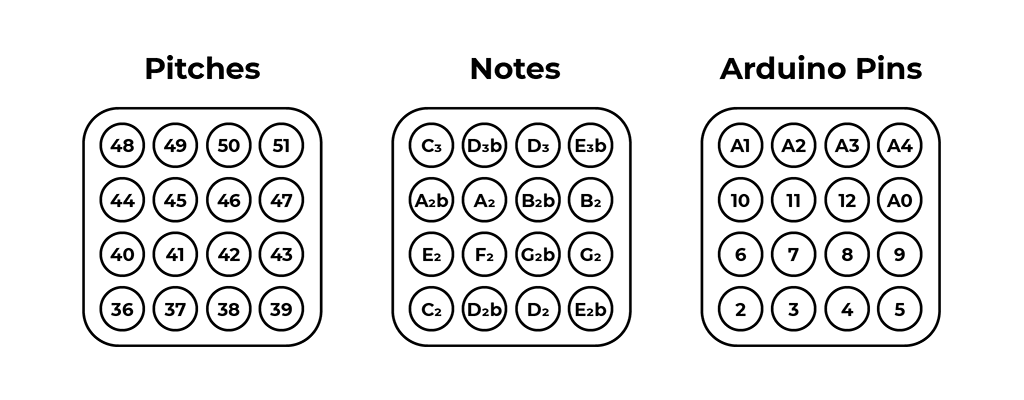
The final step was to map every pitch to a button. For the 16 buttons, I defined a scale from C2 to E3b, which are the pitches from 36 to 51 in a sequence from bottom to top and left to right. Check out this file from Arduino Tutorials to see what pitch corresponds to each note.
I used digital pins from 2 to 12 and analog pins (using them as digitals) from A0 to A4.
And this is how the final code looks like:
The Case
To keep this project simple, I was too picky choosing which features to include.
- Buttons only: 16 Sanwa-like arcade buttons, in a 4x4 grid. No knobs, no sliders, no faders, or any other analog input.
- Unibody case: Use no screws, nuts, bolts, or glue for the enclosure or hold the Arduino board.
- Everyday tools: For example, I soldered the wires instead of buying a specific wire clipper for the arcade buttons.
Unibody Design
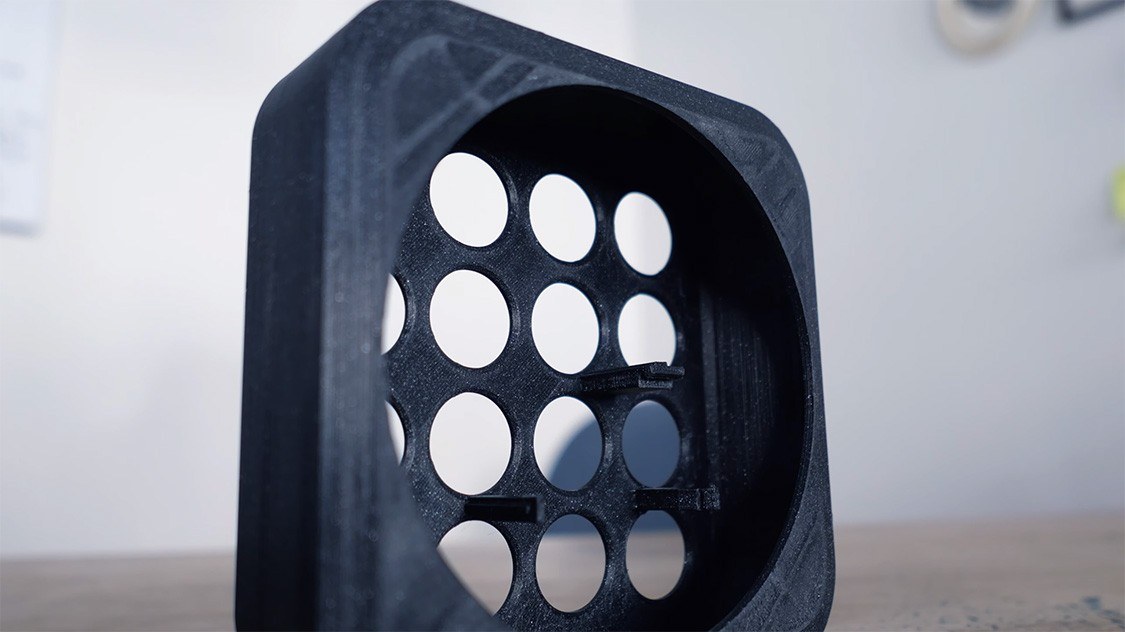
One of the challenges I faced was designing a case simple enough that it doesn't need assembly and can be 3d printed in one single run.
To avoid using screws or glue, I needed to design an enclosure that provides the smallest access to the electronics. My biggest inspiration for the enclosure was the Mac Mini, which has a circle-shaped hole at the bottom. I also wanted to design a screwable lid for that, but I decided to let it open to expose the electronics.
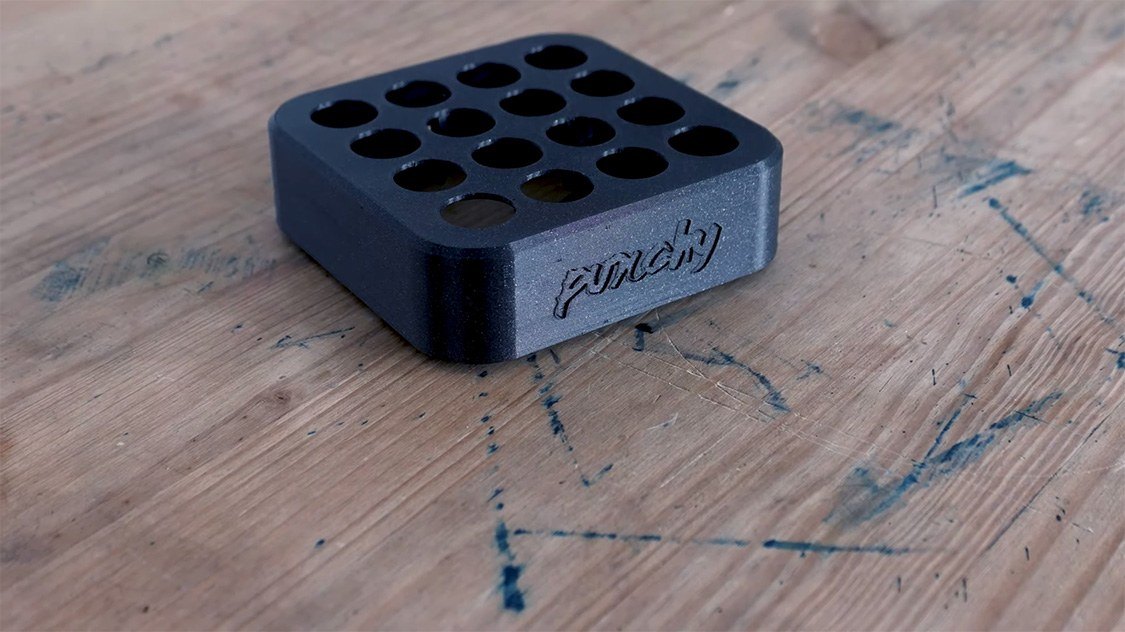
Download the 3d printable case (322 KB). Recommended settings: PLA, 0.15mm layers, 20% infill, support enforcers for the rounded bottom hole, the Arduino holders, and the micro USB.
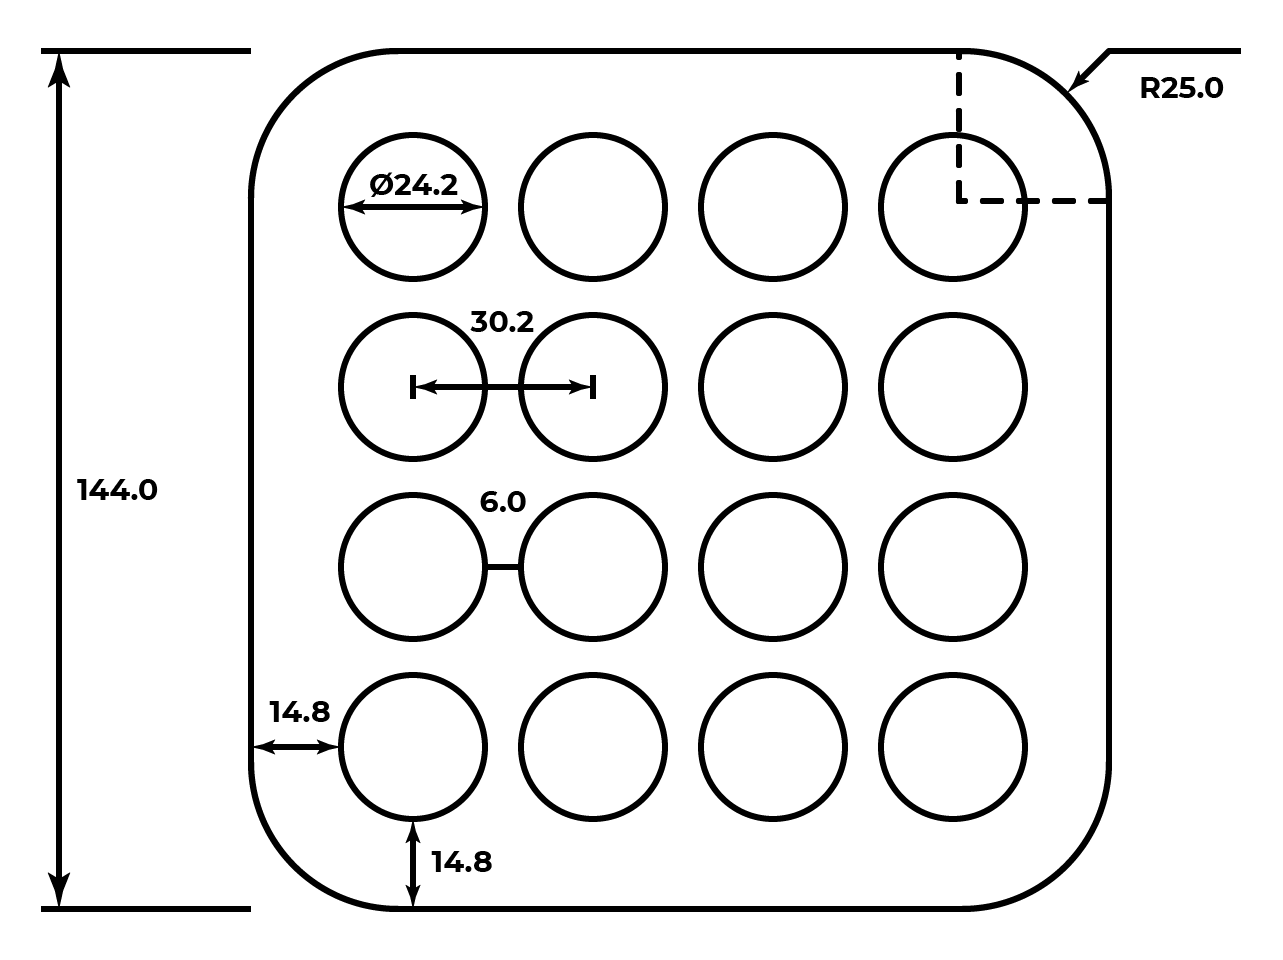
These are the dimensions (in millimeters) used for the 3d printed case:
Holding an Arduino with no screws
The Leonardo has four holes to screw the board into any suitable case, but my idea was to make it easy to add and remove the board from the case.
Finding a clip holder for Arduino on Thingiverse was easy, and it took me five iterations to integrate that holder into the unibody design. The most challenging part was making its legs avoid the holes for the buttons and make the micro USB center aligned to the case.
The Assembly
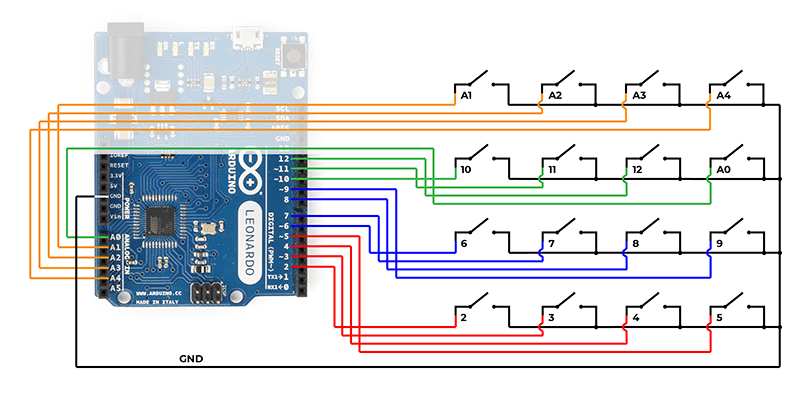
Here is the wiring diagram for the MIDI Controller:
After inserting all the buttons in place, I soldered short black wires joining all the buttons' negative legs..
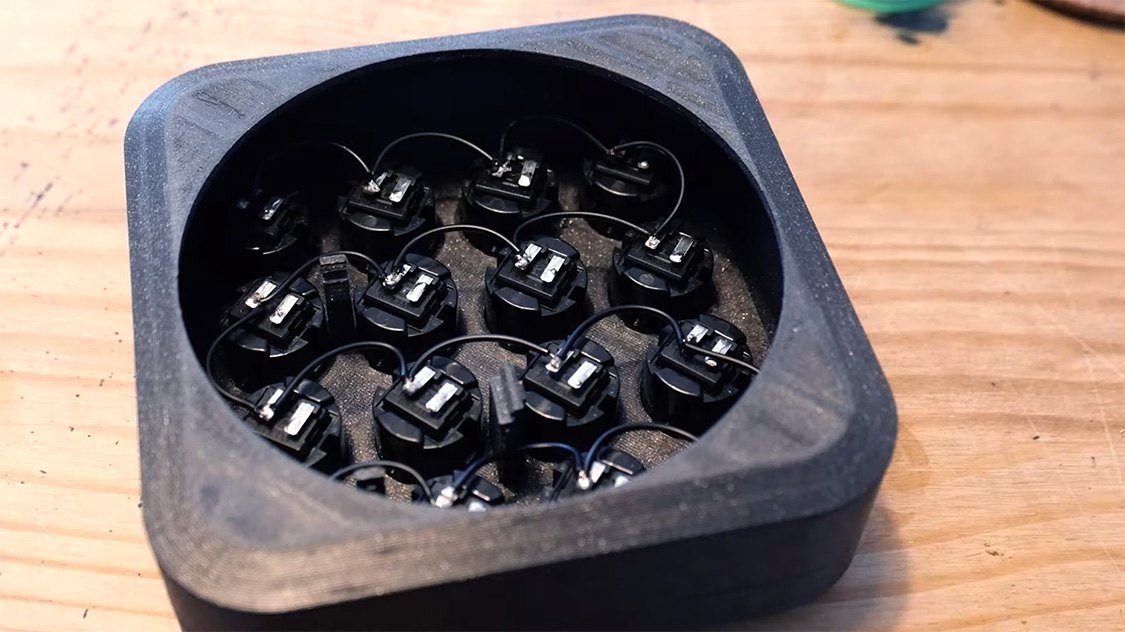
Then I soldered long red wires from each positive leg to connect directly to the board.

I cut and soldered some Dupont ends and covered them with heat-shrink tubing to connect the wires to the Arduino.
I connected the wires to the board following the same order as in the MIDI Fighter. From bottom to top and from left to right.
Using the MIDI Controller
You can use any music software (or suitable hardware) to receive MIDI and make some music. The most recommended ones are Garage Band, Ableton Live, and I know there are a bunch of apps to install on a phone.
All those tools are useful for loading predefined sounds for finger drumming, but they were made for bigger purposes. Those tools can be tough for beginners to set up.
MIDI in the Web browser
To make something more aligned with this project and its simplicity, I built a Web tool completely focused on MIDI controllers.
Punchy: WebMIDI and WebAudio implementation for MIDI controllers.
It can read MIDI messages on any browser that supports the WebMIDI JavaScript API. Then it plays sounds in a synthesizer (using the WebAudio API) or in a sampler, loading custom sounds from any sound pack.
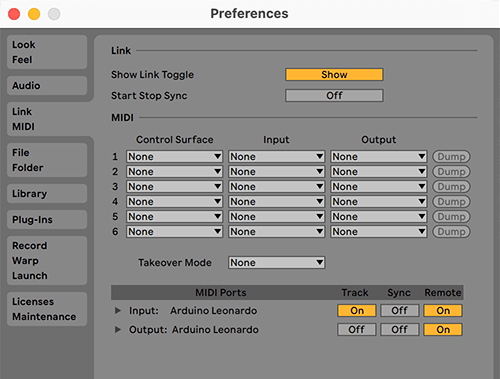
Set up Ableton Live
To make the MIDI Controller work with Ableton Live, follow these simple steps from their official documentation.
Go to Preferences → Link MIDI and make sure the "Input" has "Track" and "Remote" ON and the output has "Remote" ON as well as mentioned in the guide: