Editor's note : I've made sure I've got up-to-date info here.
I spent one year building an arcade machine. I found myself installing and reinstalling RetroPie on my Raspberry Pi a million times to get it right for the type of work I wanted to do. Every time I needed to reinstall, I had to reconfigure the entire system by following the same steps repeatedly.
The reinstalling was mostly because of the lack of information about many setup choices you have to make if you want to get the most out of your Raspberry Pi.
Installing RetroPie
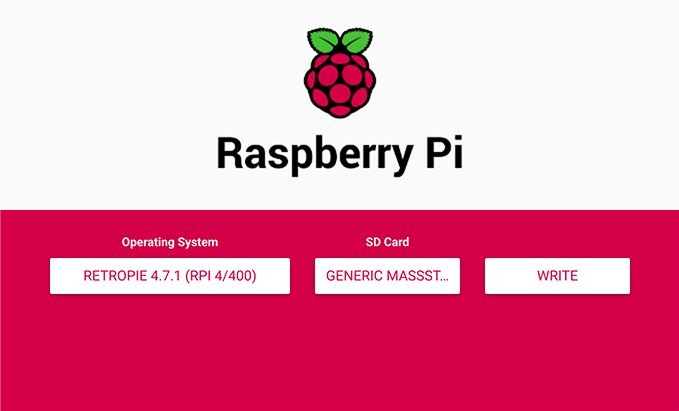
The first step is burning the RetroPie image into the SD card.
- Step 1. Identify which model of the Raspberry Pi you have.
- Step 2. Connect a compatible SD card to your computer.
- Step 3. Download and install the official Raspberry Pi Imager.
-
Step 4. On the Raspberry Pi Imager, go to Operating System → RetroPie and select the version that belongs to your Raspberry Pi model. Also, choose your SD card.
Games: SD card or external drive?
From here, you have two options: installing games into the SD card (efficient when your SD card is big enough) or installing them on an external drive (most ideal for small SD cards).
If you prefer to keep games and RetroPie on the same SD card, you can avoid the section "Setting up the external USB Storage".
To install games on an external USB drive, do not plug the SD card into the Raspberry Pi.
- Step 5. Extract and reinsert the SD card into your computer.
You'll notice the SD card is now called boot.
Setting up the external USB Storage
Keeping the games (ROMs) and the saved games progresses in an external source makes it easier to experiment with RetroPie in the SD card, keeping the critical data safe in a plug-n-play source.
It's also a good option when you have a small SD card with enough space for no other thing than RetroPie.
- Step 6. Format a USB drive as
FAT. Use any disk utility available on your OS for it. - Step 7. Create a folder named
retropie-mounton the root of the USB drive. It will be used by RetroPie every time you boot the system.
Find more info about this in the official RetroPie documentation.
Overclocking the Raspberry Pi
If you have an old model of Raspberry Pi or a Raspberry Pi Zero,it is recommendable to overclock your board. That way, you can run games that require more power. For example, a Raspberry Pi Model 1 and Zero can't run most of the Neo Geo or MS-DOS games, but an overclocked Pi can do it.
There are two ways to overclock a Raspberry Pi: the wrong one and the right one.
The wrong way lets you expand the core and memory as you wish, but it's dangerous to your board and voids the warranty.
Raspberry Pi provides an official way to do it right: Introducing Turbo Mode: up to 50% more performance for free.
I recommend you to do it in the right way:
- Step 8. Edit the file
/config.txtand add (or uncomment if it's already there):force_turbo=1
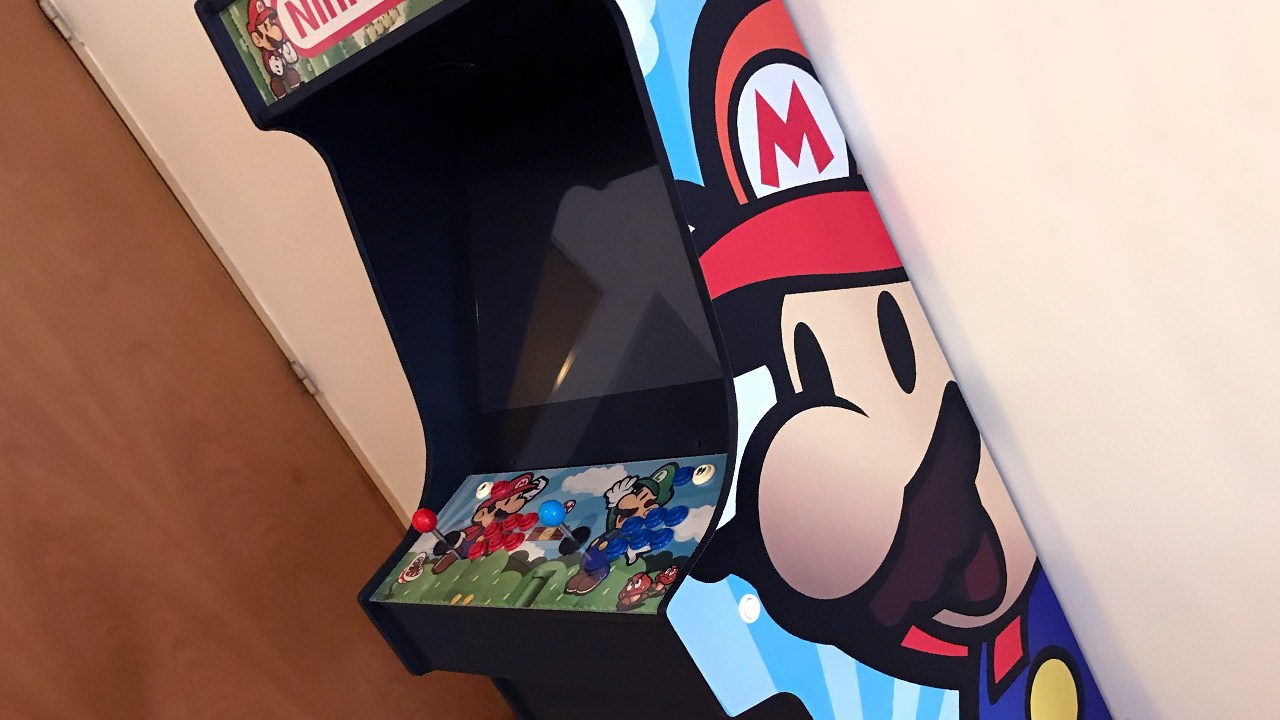
Setting up an arcade controller
It took me a while to understand how to set up an arcade controller. Even though the documentation is right there, I didn't know the arcade controllers' name was Xin-Mo.
- Step 9. Edit the file
/cmdline.txtand write at the end:usbhid.quirks=0x16c0:0x05e1:0x040
There are a few more steps to configure the controller but wait until turning on the system.
HDMI sound
If you're using a computer monitor like me, it probably doesn't have built-in speakers. In some cases, this kind of monitor has a 3.5mm jack to output sound to external speakers. In that case, you may have to make that the HDMI takes control over the sound:
- Step 10. Force the sound to go through HDMI by adding the following line to the file
/config.txt:hdmi_drive=2 - Step 11. Increase the sound quality by updating the
/retroarch.cfgfile with:audio_out_rate = 44100
The headphone jack's sound is a lot clearer with a lot less static using that configuration.
Now turn on the Raspberry Pi
Plug the SD card and the USB drive into the Raspberry Pi and turn it on. As it is the first time to run RetroPie, it will take some time to process.
The first screen to appear is to set up the controllers:
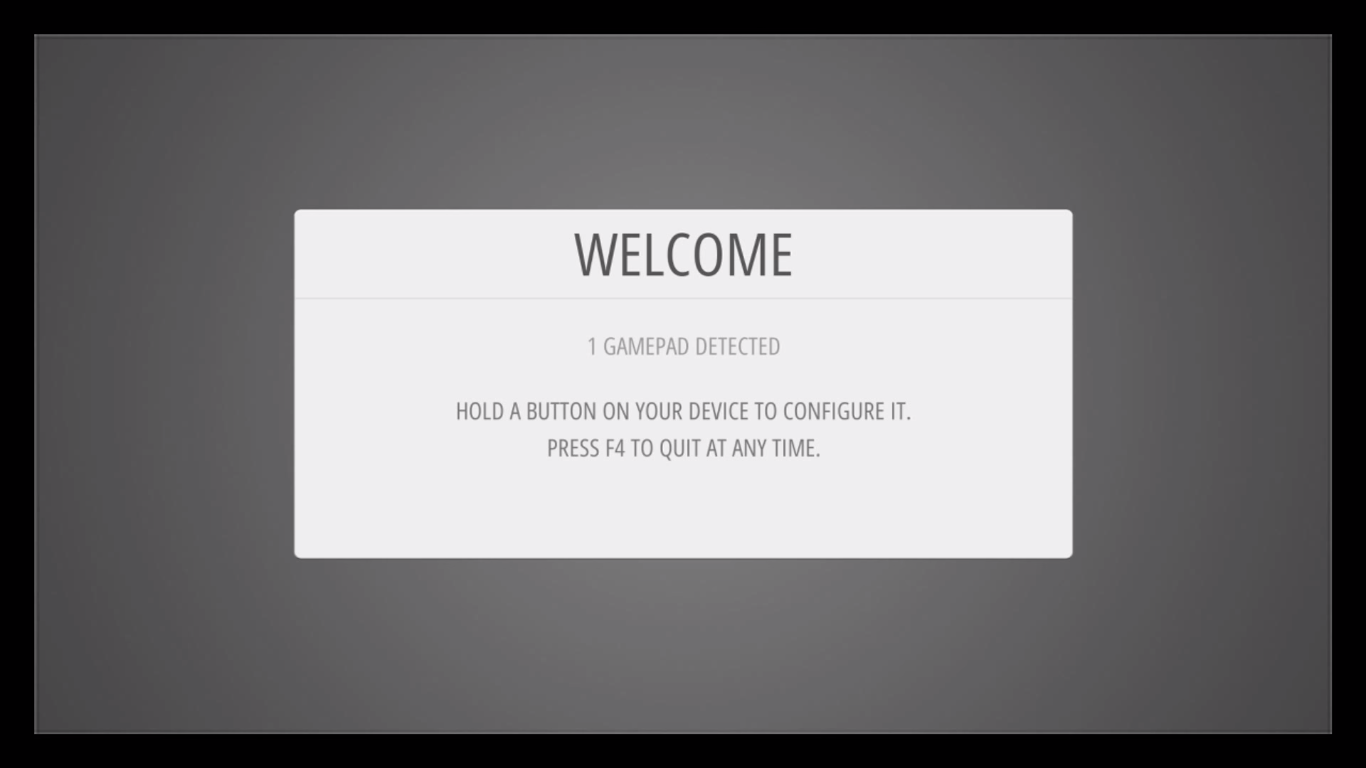
Setting up the controllers
- Step 12. Set up each button of your controller. For an arcade machine (Xin-Mo controller), I recommend using the same distribution as the Sega Genesis controller. For any control that you don't need to set, keep pressing any key to choose
-NOT DEFINED-.
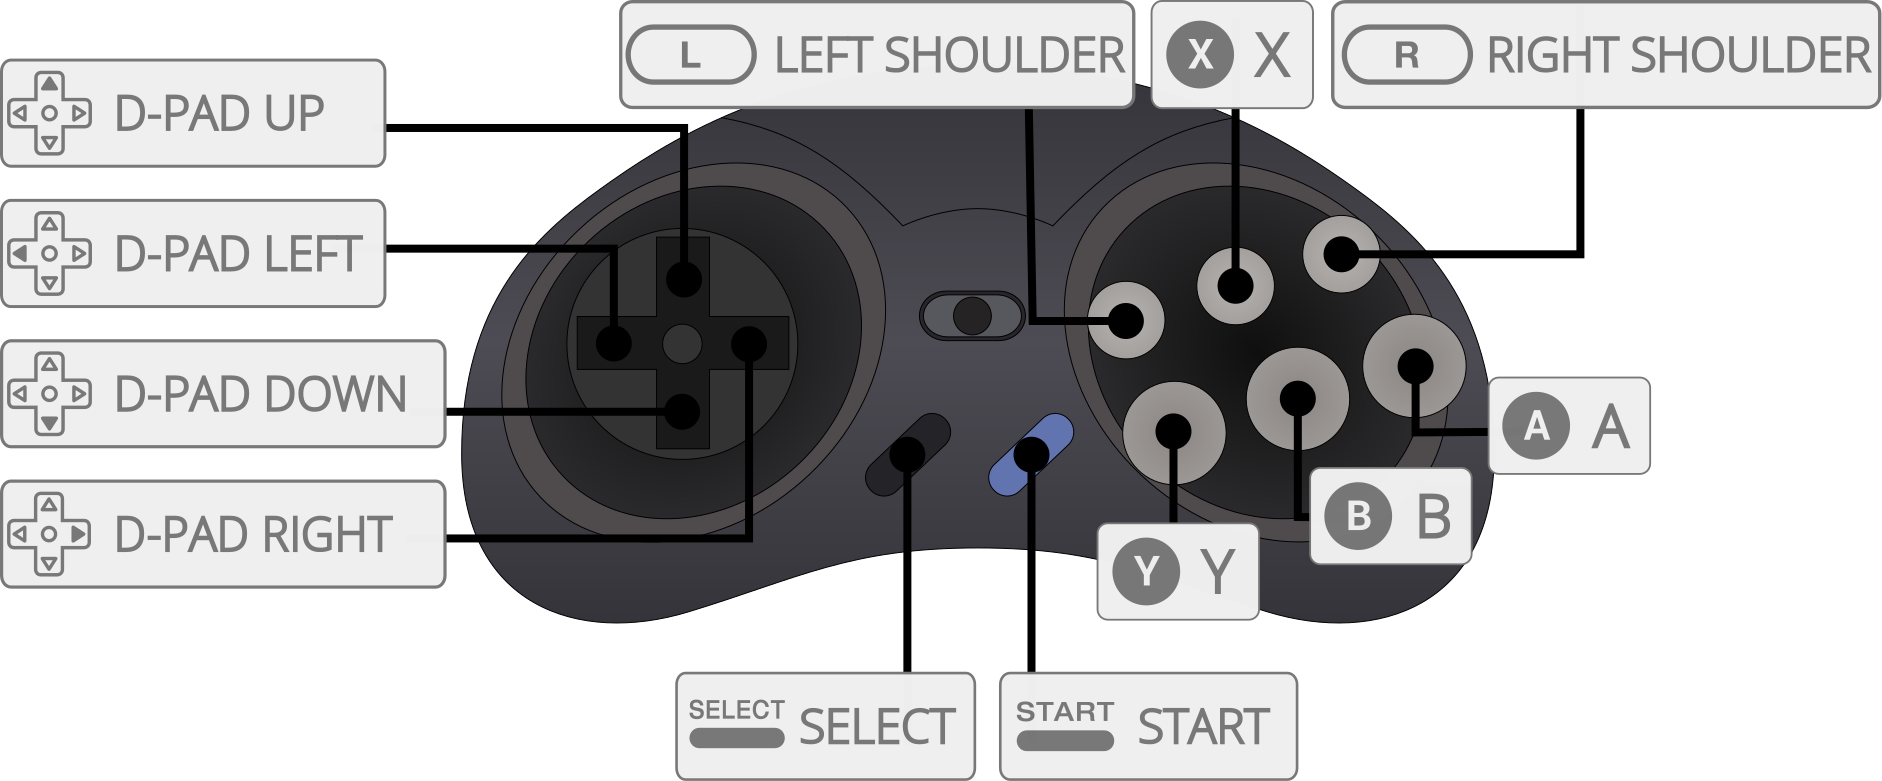
You can change this later and also set up different controller distributions for individual consoles and games.
The A button becomes the Enter key, and the B button becomes Escape.
To set up the controller for the second player:
- Step 13. Press
Startto open the menu, then selectConfigure input, this time keeping any button of the second controller pressed.
Installing games
That was all related to the initial setup. Now it's all about games!
If you followed the steps to install games on the SD, follow the official documentation about all the possible ways to transfer ROMs.
To install games in the external USB drive and if you followed the steps detailed on Setting up the external USB Storage, then:
- Step 14. Unplug the USB drive from the Raspberry Pi and plug it into your computer.
Now the folder /retropie-mount should have some folders inside:

ROMs
All the game ROMs must go inside the folder /retropie-mount/roms.
- Step 15. Place the ROMs into its corresponding console folder. Avoid zip files because they are not supported.
- Step 16. Plug the USB drive into the Raspberry Pi and wait until the drive's LED stops blinking.
- Step 17. Reset EmulationStation going to Start (menu) → Quit → Restart EmulationStation
The ROMs are now on EmulationStation. You're going to see them in the main menu of RetroPie under the console name. Repeat steps 14-17 to add more ROMs.
Specific setups
Following the steps above, you'll have access to the most common consoles and games. But by following a few more steps, you can go beyond that.
Sega Megadrive/Genesis buttons
The Sega emulator recognizes only three buttons by default (Megadrive controller). In my case, I had installed six buttons in my arcade cabinet, so I activated all of the buttons (like a Genesis controller):
- Launch a Megadrive/Genesis game and go to the RetroArch menu ("Select" + "X").
- Go to Quick Menu → Options and set the two input devices to six buttons pad.
- Exit the RetroArch menu.
Neo Geo BIOS
This emulator works a little differently from the other ones. Before copying ROMs, you need to:
- Get the Neo Geo BIOS: There is plenty of sites where you can find the neogeo.zip file you need.
- Copy the zip file (compressed) to /retropie-mount/BIOS and /retropie-mount/roms/neogeo
- Move ROMs as zip files (compressed) to /retropie-mount/roms/neogeo
- Restart EmulationStation.
Note: Most of the games won't work the first time, but you can change the emulator for those specific games:
- Open a game and press any key before it loads.
- Go to Select emulator for ROM → lr-fba (or any other emulator) → Exit without launching.
- Relaunch the game manually.
- If the game still doesn't work, try the same steps with another version of the game.
Visit this complete video tutorial for more info:
MS-DOS emulator
Beyond this point, you'll need to use a keyboard.
- Connect the Raspberry Pi to the Internet.
- Go to the RetroPie settings: "RetroPie" → "Retropie setup". The first time getting there can take several minutes.
- Install DosBox: "Manage packages" → "manage optional packages" → "dosbox" → "install from binary". It will take some time because it needs to download packages from the Internet.
- When it ends, go back to the main menu, then restart the system: "Perform reboot".
Now MS-DOS is a console in the list of consoles. A new folder /retropie-mount/roms/pc will also be created automatically in the USB drive.
Visit this complete video tutorial for more info:
MAME emulators
I had the worst experience trying to understand this platform. I recommend to play arcade games on Neo Geo or find a version of the games for a more common console. In case you choose to use MAME, this is what worked for me.
There are different versions of MAME that were launched in different years. So, for example, if you have the emulator for MAME 0.37b5, you must get games with the specific version 0.37b5. For some versions, the games are far more challenging to get than others. Another factor that determines which version you need is the Raspberry Pi model.
- For Raspberry Pi Zero and 1, ROMs have to be version 0.37b5 (mame2000).
- For Raspberry Pi 2, 3, 4, and 400, ROMs have to be version 0.78 (mame2003).
Then to copy ROMs:
- Copy zip ROMs to the folder /ROMs/arcade.
- Do not use folders specific for emulators, like
/mame-xxxx. - Upload compressed (.zip) ROMs. Folders won't work.
The first time a game is running, it will ask for an emulator to run:
- For Raspberry Pi Zero and Pi 1, choose
mame4all(mame2000). - For Raspberry Pi 2, 3, 4 and 400, choose
lr-mame2003(mame2003).
And...
That's all far I could go. I'll update this guide as I find more and better solutions.